1. Trace the pattern pieces onto paper. Fold orange felt in half, pin pumpkin pattern piece to the felt with the straight edge on the fold; cut two. Pin eye, nose, and mouth pattern pieces to the black felt and cut out. Remember to cut two eyes.
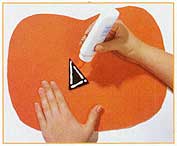
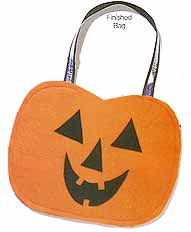
2. Glue the face pieces to the pumpkin. As an option, you can sew the pieces to the pumpkin by hand or by machine, using black thread. Be creative and use your own face shapes, or use fabric paint to draw the face or add embellishments.
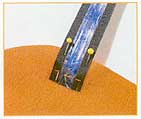
3. Pin the ribbon handle in place on the pumpkin section without the face pieces. Baste the ribbon in place. You can use any 1" (25mm) wide ribbon. For safety, use ribbon with reflective tape.
4. Place the pumpkin section with the face on top of the pumpkin section without the face (wrong sides together), sandwiching the ribbon in-between. Pin around the outer edge. Now you're ready to sew.
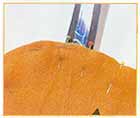
5. By hand or machine, stitch around the outside of the pumpkin approximately 1/4" (6mm) from the edge. Leave a 4" (10cm) opening at the top between the handles. 6. Remove the pins and get ready to go trick or treating!
More Great Ideas:
Make mini pumpkins for party favors! Use a photocopier to reduce the pattern pieces 50%. Fill the pumpkins with candy corn or other treats.
Have a pumpkin party! Provide felt, ribbon, and glue. Everyone goes home with a bag!


 A fun, easy project for kids ages 5 and up! Teach them how to sew and the fun will last long after the candy is gone!