|
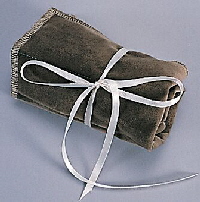 This handy accessory is wonderful for carrying your serger notions to and from classes. Plus, you’ll always be prepared whenever you want to use your serger. This handy accessory is wonderful for carrying your serger notions to and from classes. Plus, you’ll always be prepared whenever you want to use your serger.
Important Note: These project instructions are specific to the Janome Compulock or MyLock serger; however, the project can be adapted for use on other sergers.
Janome Supplies Required
- Compulock or MyLock serger
- Serger needles size 11
- All purpose foot
- Chainstitch conversion accessories
- 2 spools of Janome Decorative Serger thread
- Spool of Janome Overlock thread (60wt)
Fabric And Notions Required
- Fabric:12” x 12” (30.5cm x 30.5cm) piece of faux suede
12” x 12” (30.5cm x 30.5cm) piece of cotton
12” x 5” (30.5cm x 12.7cm) piece of clear vinyl
- One yard (.91 meter) of 1/4" (0.6cm) ribbon
- Quilting ruler
- Rotary cutter
- Washable glue stick
- Fabric marking pen
 Instructions Instructions
1. Set up your serger for a chain stitch with overlock thread in the needle and decorative serger thread in the chain looper.
2. Using a fabric marking pen and ruler, mark pocket divisions that will accommodate your serger accessories on the right side of the suede fabric.
3. Place the wrong side of the cotton fabric against the wrong side of the suede fabric, and secure the two layers with glue stick.
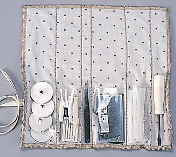
4. Place the clear vinyl on top of the cotton fabric (this will be the notions pocket).
5. With the vinyl side down and starting at the bottom, sew the pocket divisions.
Hint: When you begin to sew, slightly lift the vinyl up from the bed of the serger. Once it engages the needles, you can release the fabric so it can feed evenly.
6. Fold the ribbon in half, and pin the ribbon 3-1/2" (8.9cm) from the bottom on one side of the notionette. The folded edge of the ribbon should be even with the raw edge of the suede (ribbon tails toward the notionette) and on the right side of the suede.
7. Set up your serger for a 3-thread wide overlock stitch with overlock thread in the needle and decorative thread in both loopers.
8. With the vinyl side down, serge across the bottom of the notionette to finish the raw edge of all layers. As in Step 5, slightly lift the vinyl up from the bed of the serger when you begin.
9. Serge the remaining three sides, being careful not to catch the ribbon tails.
10. Hide thread tails, dab with seam sealant, and set aside to dry.
11. Put serger notions into divisions.
12. To close notionette, fold down top to encase notions, roll up, then wrap ribbon around and tie in a bow.
Project created by Maddie Bushman, Educational Coordinator
9/04
|


