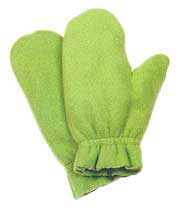
Here's a great way to keep little hands busy and warm! Teach them to make mittens. This Kids' Corner project is a little more challenging than those ot the past, but once your kids make one pair they'll be itching to make more.
You Will Need
4 remnant pieces of double sided fleece or felt: 10" x 8" (25.5cm x 20.5cm) each
1. Trace one mitten size from this page to use as your pattern. Cut four mitten pieces from the fleece or felt.
2. With right sides together, stitch two mitten pieces together from the outside lower edge to the point between the fingers and thumb.
3. Press the seam open at the lower edge. To form the casing for the elastic, on the wrong side, position the bias tape 1" (2.5cm) from the edge. Stitch close to the long edges of the bias tape.
4. Cut two pieces of elastic the size of your wrist plus 1 1/4" (3.2cm). Attach a small safety pin to one end of the elastic and thread it through the casing, keeping the ends even with the raw edges. Baste the elastic in place at the ends.
5. Stitch from the point between the fingers and thumb up around the top of the thumb down to lower edge. Clip to, but not through, the point between the fingers and thumb. Trim the seam allowances to 1/4 " (6mm).