|
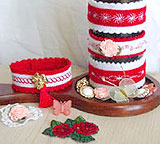
 Cuff bracelets are crafted in everything from pricey suede and fancy jewels to bits of felt and buttons. Try these techniques and watch the smiles from your recipients. This project can be sewn with any sewing machine with embroidery stitches. The samples use both wide and narrow designs from a Brother ULT2002D, but the bracelet can be proportioned for your favorite patterns of any width. Cuff bracelets are crafted in everything from pricey suede and fancy jewels to bits of felt and buttons. Try these techniques and watch the smiles from your recipients. This project can be sewn with any sewing machine with embroidery stitches. The samples use both wide and narrow designs from a Brother ULT2002D, but the bracelet can be proportioned for your favorite patterns of any width.
Level of Difficulty: Beginner
Important Note: These project instructions are specific to the Brother ULT2002D machine; however, the project can be adapted for use on other machines.
Materials and Supplies
- Non-raveling fabric like craft felt (two colors used in samples)
- Iron-on stabilizer/backing such as Craft
- Fusible hook-and-loop tape to best match backing fabric (3/4”-wide soft variety, if vailable)
- Embroidery thread (for top and bobbin)
- Washable marking pen
- Pinking or scallop scissors (fabric scissors, not paper scissors; optional)
- Wash-away stabilizer like Solvy (optional)
- Buttons, ribbons, or other trims (optional)
Instructions
1. Measure wrist for the length of bracelet and add 2” for ease and overlap. For example: a small wrist of 5-1/2” might like a finished length of 7-1/2”.
2. Apply iron-on stabilizer to the back of non-raveling fabric. Cut several strips 1” wide by finished length plus another 1”. On right side of strip, draw a line lengthwise down the center of fabric with the washable pen (test to make sure pen does not permanently mark fabric). With the stabilizer next to your feed dogs, experiment with different stitches until you find the one you like. Practice keeping stitching straight and even using the line marked in the center of the strip as a guide. Your fabric may need a layer of wash-away stabilizer on top, too, to keep the foot moving smoothly. Wider or multiple patterns will need a wider strip.
3. Trim the long edges of the embroidered strip, leaving the same amount of fabric showing on either side of the embroidery stitches. A finished width of 1/2” is good for narrow embroidery, wider for larger stitches.
4. Cut a strip of backing fabric 1-1/2” wide by the length of embroidery strip. If you are making a wider cuff, cut the backing strip about 1/2” wider than the embroidered piece.
5. Cut a 1”-long piece of the 3/4”-wide hook-and-loop tape and place on one end of backing fabric so it is centered and the 3/4” dimension is placed along short end of backing; zigzag stitch in place.
6. Place the embroidered strip on top of backing fabric, centering the embroidered strip lengthwise and having the wrong side of embroidered strip against plain side of backing strip. Using a narrow zigzag stitch and thread to match embroidered strip, sew the two pieces together around all four edges.
7. Using pinking or scallop scissors, trim each edge of the backing fabric, leaving the same amount showing on each side of embroidery strip.
8. Trim ends of bracelet to proper length. Zigzag stitch the other side of hook-and-loop tape to the opposite end of bracelet on the embroidery side. Try on and admire!
Further embellish with buttons, tiny tassels, embroidery, or purchased patches. For wider cuffs, try several rows of embroidery. A length of fancy ribbon sewn to a backing makes a great cuff, too.
Project developed by Early Irwin, Education Consultant
4/05
|

