|
 Duvet covers are very easy to sew, because they are made from just two pieces of fabric. You could use the same fabric for both sides, or choose two contrasting fabrics for a reversible duvet. For those cooler nights, make one with flannel on one side. Gripper-tape is used to close the opening at the bottom. Duvet covers are very easy to sew, because they are made from just two pieces of fabric. You could use the same fabric for both sides, or choose two contrasting fabrics for a reversible duvet. For those cooler nights, make one with flannel on one side. Gripper-tape is used to close the opening at the bottom.
Materials
- General sewing equipment
- Poly-cotton sheeting
- Gripper-tape, 24 inches (61cm) shorter than the width of the duvet cover
- Matching thread
Measuring
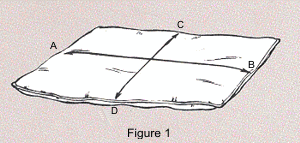
To determine the size of your new duvet cover (Figure 1):
- Measure the length of your comforter from points A to B
- Add 2-5/8 inches (6.7cm) for hems
- Double this measurement
- Measure the width from points C to D
- Add 1-1/4 inch (3.2cm) for seams
Instructions
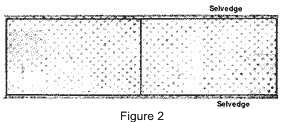
Lay your fabric right side down and mark the cutting lines for the two pieces of fabric with tailor’s chalk (Figure 2). Cut out the two pieces.
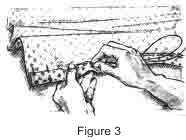
Make a double hem across one end of each piece by turning 1 inch (2.5cm) to the wrong side twice, then pin in place. Baste the hem and remove the pins (Figure 3). Machine stitch close to the basting, then press the hems.
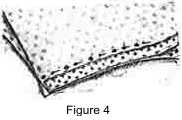
Place the two pieces of fabric with the right sides together and the hemmed edges aligned. Pin the two pieces together on the inside edge of the hem for a distance of 12 inches (30.5cm) from the side edge toward the center (Figure 4).
Baste along each line of pins, and then remove the pins. Machine stitch close to the basting (Figure 5).
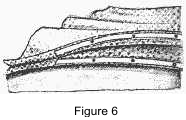
Unfasten the strip of gripper-tape, and position each part with one long edge close to the hem stitching line across the opening. Center the tape so that a snap is at an equal distance from each side of the opening, and check that the snaps are aligned on the two layers (Figure 6).
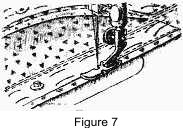
Machine stitch the tape in place using a zipper foot so that you can stitch in a straight line past the snaps (Figure 7).
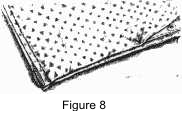
Fasten the snaps (Figure 8).
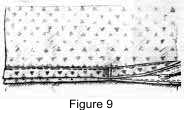
At each end of the opening, machine stitch through all layers, from the folded edge to the stitching line of the hem, to enclose the raw edge of the gripper-tape. Make a second line of stitching close to the first and fasten securely (Figure 9).
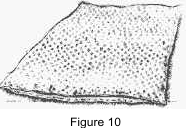
Turn the cover right sides out (Figure 10). Pin each side and top edge of the cover, then baste and remove the pins. Machine stitch 1/4 inch (0.6cm) from the raw edges. Trim the seam to 1/8 inch (0.3cm).
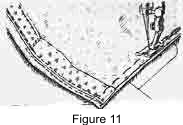
Turn the cover inside out and machine stitch around the three sides 1/4 inch (0.6cm) from the folded edges, enclosing the raw edges (Figure 11).
Turn the cover right sides out again, and press.
As an alternative fastening for the duvet cover, you could use buttons or tied bows.
From: Pillows, Curtains & More, by Myra Davidson
10/03
|