|
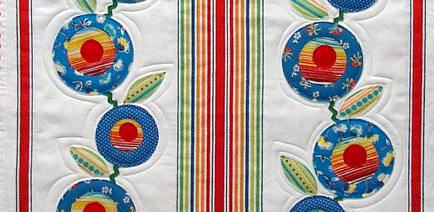
 Fun appliqué shapes and easy free-motion quilting add to the retro look of this dishtowel mini quilt. It goes together quickly and makes a great table decoration or wall hanging. (dishtowelquilt.tif) Fun appliqué shapes and easy free-motion quilting add to the retro look of this dishtowel mini quilt. It goes together quickly and makes a great table decoration or wall hanging. (dishtowelquilt.tif)
Supply List
- Dish towel
- ½ yard fabric for backing
- Low-loft batting (1” larger than towel on all sides)
- Scraps of fabric for the appliqué
- Green rickrack for stems
- Red rickrack for edge trim
- Double stick fusible web such as Steam-A-Seam 2
- Cups and coins in a variety of sizes
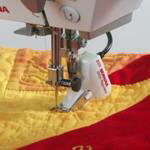
- Your favorite free-motion quilting foot
Try the BERNINA® Stitch Regulator – available for aurora and selected artista machines, this free-motion presser foot works with the machine to regulate the stitch length as you move the fabric. You can master free-motion stitching in minutes without hours of practice!
 Instructions Instructions
1. Wash and dry the dishtowel. They shrink a lot and it's better to shrink them before sewing.
2. Gather a variety of cups, glasses, and coins to use as templates for the flowers and flower centers.
3. Use the fusible web as directed by the manufacturer. Trace circles onto the fusible web and fuse to the back of the desired fabrics.
4. Cut out the drawn appliqué pieces.
5. Place the appliqué pieces on the towel as desired. Tip: Put the dishtowel on your design wall and play with the placement until happy with it.
6. Cut short pieces of green rickrack for the stems and place them on the towel with the ends under the flowers.
7. Fuse the flowers to the towel.
8. Cut the batting 1" bigger than the towel on all sides. Cut backing 1½" bigger than the towel on all sides. Layer and baste the towel, batting, and backing. Note: Cotton dishtowels are casual and a bit stretchy. The “not-perfectly-straight” edges of the dishtowel are fine when the mini quilt is used flat as a table decoration. If planning to hang the quilt, be extra careful to keep the edges straight when basting.
9. Lower the feed dog of the machine and free-motion quilt the towel as desired. Use an all-over pattern, covering the entire surface of the dishtowel or use the appliqué shapes to direct your quilting, outlining or echoing the fused shapes. Do not quilt all the way to the edge of the towel – stop ½" to 1" away from the outer edge. Most towels are hemmed… stop just short of the hem.
10. After the quilting is complete, turn the quilt wrong side up. Trim the batting carefully with scissors so that it is ⅛" or so inside of the edge of the towel.
11. Turn the quilt right side up and trim the backing fabric ¼" outside of the edge of the towel.
12. Turn the quilt wrong side up. Turn under the edge of the backing fabric so that the folded edge is just inside of the edge of the dishtowel. Pin the turned under edge in place. Press the edge.
13. Sew the backing in place with matching thread.
14. Pin rickrack border trim in place. Sew it to the quilt.
Becky Goldsmith, Piece O' Cake Designs
3/06
|