Free Sewing & Craft Projects, Learn to Sew, Guidelines Articles, Charitable Projects, Bridal, Kids & More

sewing and craft projects at www.sewing.orgsewing and craft projects at www.sewing.org


Find a Sewing Teacher
Guidelines for Sewing
line_menu


Baby & Toddler
Bridal Sewing
Charitable Sewing
Dolls, Toys, Games
Fashion Sewing
Fun Projects
Home Decor
Jewelry
Kids Projects
Men's Sewing
Pets
Pillow Projects
Purses, Bags, Totes
Quilt Projects
Teen Projects


Christmas & Winter
Halloween
Thanksgiving
Other Holidays
line_menu


My Sewing/Craft Room
SEW-lutions Blog
line_menu


Advertise With Us
Contact Us
Newsletter Sign-Up
line_menu


Body Form Booklet
Sewing Gifts


spools_thread

Sewing & Craft Alliance


Sewing & Craft Alliance


sewing.org
nationalsewingmonth.org
trainedsewinginstructor.com
sewtrendy.com
 

Kids Sewing & Craft Projects

Project provided courtesy of:
JoAnn Fabric & Craft Stores©

Kid’s Fleece Tulip Cozy

Supplies

  • Fleece: dark yellow, light yellow, green
  • Polyester batting 45"x60", 1 pkg
  • Sewing machine & basic sewing supplies
  • Pattern paper
  • Walking foot
  • Patterns and Project file

Directions

  1. Enlarge all patterns approximately 800%. This will vary depending on how you print out pattern. See measurement on flower pattern A to determine your enlargement. Place pattern A on fold of pattern paper and cut out one whole flower pattern.
     
  2. Cut with right sides together:
    • Pattern A, 2 dark yellow
    • Pattern A, 1 batting
    • Pattern B, 2 dark yellow
    • Pattern B, 2 light yellow
    • Pattern C, 2 green
       
  3. Note: sew all seams 1/4" to 3/8" from edge.
     
  4. With wrong sides of flower pieced together and batting between layers, sew all around.
     
  5. With wrong sides of petals pieced together, sew around each set. Make sets of one light and one dark yellow petal.
     
  6. With wrong sides of stem pieced together, sew around all stem pieces, adding some batting for dimension, if desired.
     
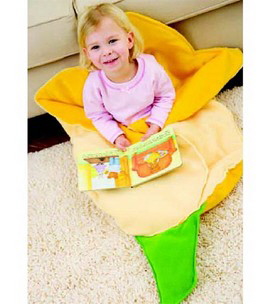
  7. Layer all pieces as pictured. Pin in place and sew around outside edges.

3/10

Back to Kids Projects
 

www.sewing.org
Privacy PolicyCopyright, Reprint, Linking